Running analyses
When your organization has compute enabled, you can run analysis applications on an image or folder directly from Cytario. An analysis reads the data you choose and writes its results back to your organization's storage on your behalf.
Starting an analysis
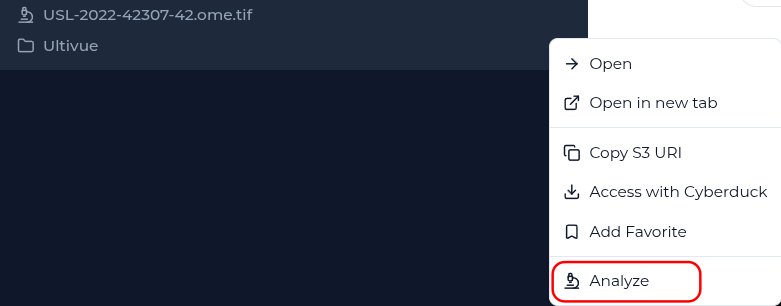
- Select the input — an image or a folder to analyze.
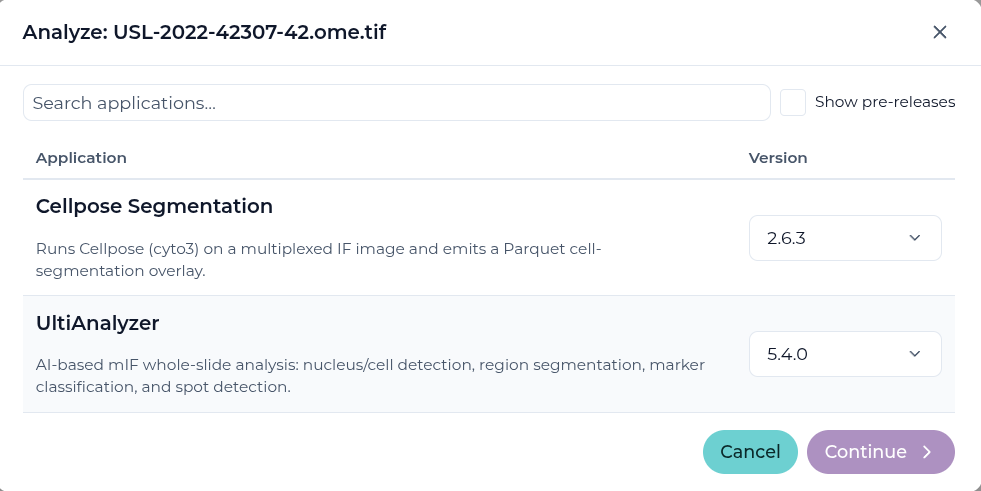
- Choose a catalog, then an application — the analysis applications available to you are listed (for example a cell-segmentation / quantification application). If your organization has connected more than one application catalog, a Catalog selector appears above the list: switching it shows that catalog's applications. Applications from different catalogs are kept apart — two catalogs can even carry an application with the same name, and each resolves to its own catalog's image.
- Configure the run — set the application's inputs and parameters, then
Save the whole configuration so you can run it again later, or Load
one you saved earlier. The Output location starts pre-filled with a
sensible default: the folder containing your input, plus
analysis/<application>/— so results land beside your data, grouped per application — with the file's name appended per job. Edit it freely before running. - Run — confirm and start the job.
Saving and loading a run configuration
The form's Save action writes the whole run to a specification — one versioned document holding everything the run needs: the analysis application and its version, the catalog it was chosen from, the parameters, the input and output locations, the compute cluster, and the resources each row requests. Load fills the form back in from that document, so you can reproduce a run exactly instead of re-entering or reconstructing it.
Every field stays editable after a load — a loaded specification is a starting point you can adjust before you run.
Where a specification lives
A specification is an ordinary object in your organization's storage, and you
choose where it goes: Save opens the storage picker so you pick the
connection and the folder to write it into, and the document is written there
as <name>.yaml for the name you enter. A default destination is filled in for
you, so if that suits you it is just a name and a click — and you can see the
location the document will be written to before you confirm.
Load opens the same picker, so you can open a specification from any location you can read — not only from where you saved it yourself.
Who can use a specification is decided by the storage connection it sits in:
- Anyone authorized to read that folder can load and run from the specification.
- You need general write access at the folder to save there.
Because it is an ordinary object in storage, placing a specification in a shared folder is how you hand a colleague a ready-to-run configuration.
What a specification does not freeze
A specification records the configuration, not the world around it. To run it again:
- The analysis application and its version must still be available.
- The input files must still exist.
If something can no longer be reproduced, the form says so explicitly rather than silently filling in a guess. A document written by an older version of Cytario still loads, and the form names anything it could not carry over — for example the compute cluster or the resource request — so you can set it before running.
What the job will request
Each row in the job list shows the resources the cluster will be asked for when you run it: the memory and (where your compute provider supports it) the disk size, each in GiB, along with the compute (vCPU), the GPU count, and the time limit. This is the exact request the job submits — not an estimate — so you can check it against the instance types your cluster offers.
To change it:
- Memory and disk size — open a row to raise either one. The editor starts you at the smallest value that will work for the row's inputs and lets you go up to the largest value the form offers (your administrator can declare the provider's maximum, and the editor shows it when set). You can copy your choice to every other row.
- Compute, GPU, and time limit — use the Batch defaults panel, which applies to every row of the run. Each setting shows the value the job will actually request, which may be higher than what you typed (the cluster rounds compute up to whole cores).
If a row cannot fit the cluster — for example the inputs need more memory than the cluster can place — the row says so instead of showing a request, and you raise the value or pick a different cluster before running.
What happens when you run
- The analysis job runs in the background. It continues even if you sign out, and its access to your storage is withdrawn automatically once it completes or is canceled.
- Results are written back to your organization's storage and are listed
alongside your data (for example under a
resultsfolder). - You can monitor the job's progress and locate its outputs when done.
Where to manage jobs
The Jobs screen in the navigation lists your analyses and their status — see Image processing jobs.
Availability
Analysis applications and compute providers are configured by your organization admin. The Jobs entry only appears when your organization has compute enabled, so its absence simply means compute is not configured for you.